As you know, people with type 1 diabetes need to maintain their blood glucose levels with insulin therapy.
The two available options for insulin therapy are insulin injections or insulin pumps. Insulin pumps can help people with type 1 diabetes better manage their blood sugar levels by providing more consistent delivery of insulin throughout the day. They also offer more flexibility compared to traditional insulin injections in the sense that they allow users to adjust their insulin regimen to better match their lifestyle and activities.
In this article, we are going to discuss insulin pumps in detail, including how to use, insert and dispose of them.
How to Use an Insulin Pump
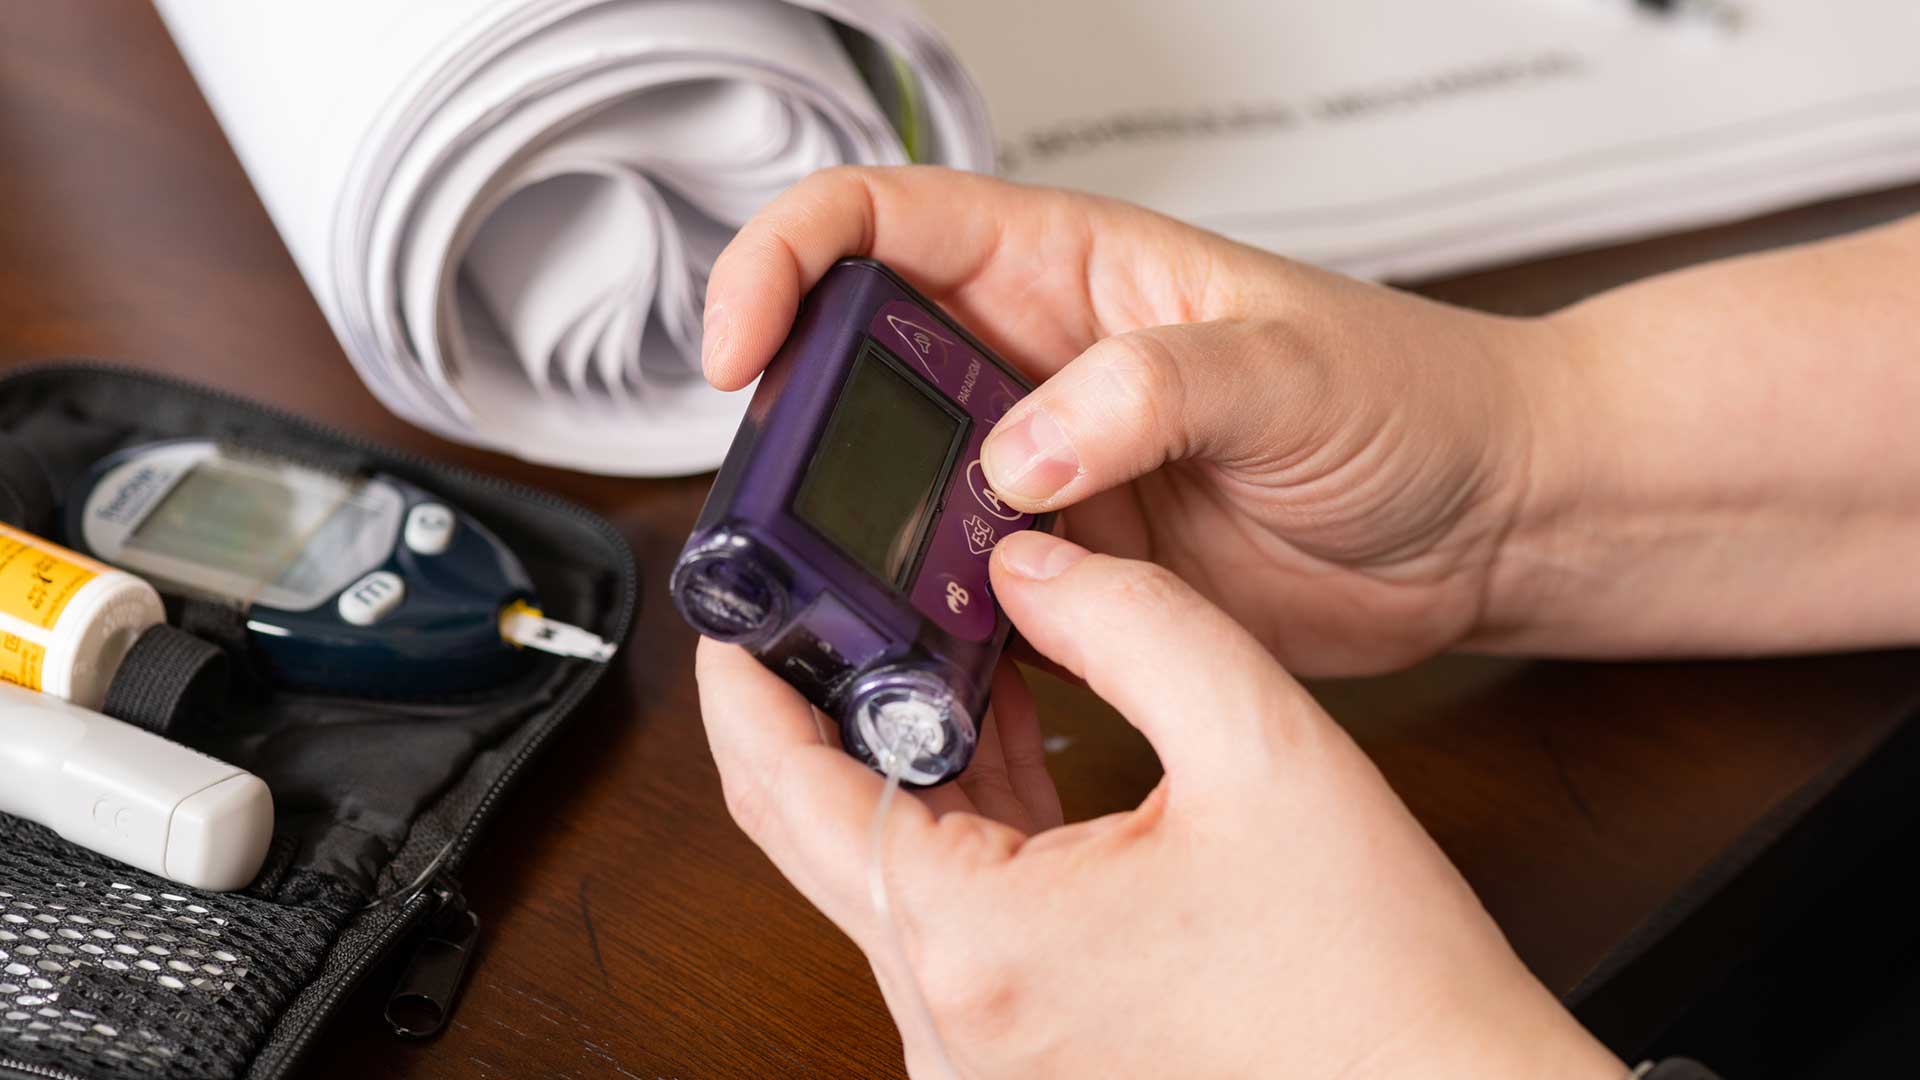
Insulin pumps are small, battery-powered devices that deliver insulin to people with diabetes. The device is worn on the body, and a small tube called a cannula is inserted just under the skin where it remains in place for several days.
The pump delivers insulin through the cannula into the body in a continuous, programmed dose, known as a basal rate. The basal rate is adjusted based on the person’s individual needs and can be set to deliver different amounts of insulin at different times of the day.
The pump also allows the user to administer additional doses of insulin, known as bolus doses. These are sometimes needed to cover meals or correct high blood sugar levels. For a bolus dose, you have to manually enter the amount of insulin needed into the pump, and it delivers it over a short period of time.
It’s very easy to use an insulin pump, all you have to do is fill up the pump’s reservoir with insulin, attach it to your body, and program it to deliver insulin according to your individual needs.
Best Places to Attach an Insulin Pump
The best places to attach an insulin pump are areas with enough subcutaneous fat to accommodate the infusion set, where the skin isn’t prone to excessive movement. The most common areas used to attach an insulin pump are:
- Abdomen: This is the most common site for attaching the pump both in children and adults. It offers a large surface area with enough subcutaneous fat and is easy to access for insertion and maintenance.
- Upper buttocks: The upper buttocks can be another suitable site for attachment. It provides ample subcutaneous fat and is less prone to interference from clothing or movement.
- Thighs: The thighs can also be used for insulin pump attachment, but they’re less commonly used than the abdomen or buttocks. The subcutaneous fat in the thighs may be thinner, making insertion and maintenance more challenging.
- Upper arms: The upper arms are also less commonly used. Much like the thighs, there isn’t much subcutaneous fat making the insertion more challenging.
Keep in mind that you need to rotate sites every 2-3 days to avoid complications like skin infections, irritation or allergies.
Also, not rotating sites often enough can lead to lipohypertrophy. This is the hardening of fatty tissue underneath your skin which prevents insulin from being absorbed evenly in that area.


How to Replace an Insulin Pump
As we just saw, replacing an insulin pump every few days is essential to avoid unnecessary complications. You might also need to replace it sooner than that if you notice signs of infection or irritation.
There are a few steps involved in replacing a pump and a few things you need to keep in mind when it comes to prepping the skin for insertion to ensure the safest and cleanest insertion possible.
Here are the steps for replacing an insulin pump:
1. Removing the Old Insulin Pump
The first thing you’ll need to do is remove the pump you’re going to replace. Here’s how you can do that safely:
- Start off by washing your hands thoroughly with soap and water.
- If you have a tethered pump, disconnect the tubing from the infusion site by carefully removing the connector. You may need to use an adhesive remover to help release the site from the skin.
- Hold the infusion site steady and remove the cannula by gently pulling it out of the skin at the same angle at which it was inserted. You may feel a slight pinch or sting during this process, but it shouldn’t be too painful.
- Check the site for any signs of infection, such as redness, swelling, or discharge. If you notice any signs of infection, contact your doctor immediately.
- Make sure you clean the infusion site well with soap and water or an alcohol swab to remove any adhesive residue.
- Apply a bandage or gauze if needed to protect the site.
Even though these are the general steps for the removal of an insulin pump, we recommend you check the manufacturer’s website for specific instructions on your insulin pump model.
2. Inserting a New Insulin Pump
You need to ensure you prep your skin well around the new insertion site. This helps reduce the risk of future skin complications. Only then can you insert the new pump.
Here are the steps to follow:
- Choose a new insertion site: Choose an area of the skin that’s clean and dry, and free from any cuts, bruises, or rashes. Avoid areas that are too close to your belly button or that don’t have a lot of subcutaneous fat.
- Clean the skin: Use soap and water to clean the skin around the new insertion site. Avoid using alcohol. This can dry out the skin and cause irritation.
- Dry the skin: Use a clean towel to pat the skin dry around the insertion site. Do not rub the skin, as this can cause irritation or micro-abrasions. Make sure the skin is completely dry before moving forward.
- Apply adhesive: Apply a skin preparation adhesive to the skin around the insertion site. This will help the adhesive on the infusion set stick better to your skin and reduce the risk of the site falling off.
- Insert the infusion set: Insert the infusion set into the skin at a 45-degree angle or as directed by your doctor. Make sure the cannula is inserted all the way into the skin.
- Secure the site: Apply a clear, waterproof adhesive dressing or patch over the infusion site to keep it secure and prevent any dislodging of the cannula.
How to Dispose of Old Insulin Pumps
Insulin pumps are battery-operated devices with an electronic circuit. Batteries from meters, pumps, and glucometers can be recycled.
You should dispose of old or non-functioning insulin pumps and electronic devices in an electronic waste bin at an e-waste center. The most straightforward way to find an e-waste center near you is to Google. If it’s a working device, you can consider donating it instead to someone or to an organization.
Connect Your Insulin Pump to Gluroo For Easier Glucose Management
An insulin pump is an alternative option for insulin injections.
This small battery-operated device helps keep your blood glucose levels under control. It also helps to reduce complications like hypoglycemia and diabetic ketoacidosis.
The pumps are easy to use once you get the hang of them and can have a lot of advantages when compared to injections. You just need to make sure you take the necessary steps to avoid any complications associated with the pump.
However, picking insulin pumps instead of injections is a personal choice. You can always switch one method over another when necessary.
Just keep in mind that you need to rotate sites every few days. And if you need help logging your previously used sites to make rotation easier, you can use Gluroo.
Gluroo is a diabetes management app that allows you to log everything from meals, exercise, insulin pump sites, CGM sites, open insulin vials, and much more!
Also, you can add family or friends to your Gluroo account and they can monitor your real-time BGL and other data from anywhere in the world.
You can download Gluroo for free today!
