As a parent of a child with type 1 diabetes, managing their insulin levels can be an ongoing challenge. One solution to this challenge is using an insulin pump.
An insulin pump is a small, computerized device that delivers insulin into the body in a controlled way. With the use of an insulin pump, both you and your child can achieve better blood sugar control, fewer injections, and greater flexibility in your daily lives.
However, with any new medical device, there are always questions and concerns. In this blog post, we’ll discuss and address the most common concerns related to the use of insulin pumps to help parents make informed decisions about their child’s diabetes management.
- How Do Insulin Pumps Work?
- How To Use an Insulin Pump?
- Pros & Cons of Using an Insulin Pump
- How to Choose the Right Insulin Pump for Your Child?
- Best Insulin Pumps for Children
- How Long Does an Insulin Pump Last?
- Best Places to Attach an Insulin Pump
- How Can You Get an Insulin Pump for Your Child?
- Insulin Pump FAQS: All You’ll Need to Know
How Do Insulin Pumps Work?
Insulin pumps work by delivering insulin into the body through a small tube called a cannula, which is inserted under the skin. The pump itself is a small device that holds a reservoir of insulin and is programmed to deliver insulin into the body at specific times and in specific amounts.
The pump can be programmed to deliver a continuous and small amount of insulin, known as the basal rate. This mimics the insulin production of a healthy pancreas. It can also be programmed to deliver larger amounts of insulin, known as a bolus, which are needed to cover meals or to correct high blood sugar levels.
The pump is controlled by a computerized device that allows for the customization of insulin delivery based on your child’s needs. It can also store information about insulin doses, blood sugar readings, and other important data to help track and manage diabetes.
Overall, insulin pumps provide a more convenient and precise way of delivering insulin when compared to injections, which can help improve your child’s blood sugar control and quality of life.
Types of Insulin Pumps
There are mainly two types of insulin pumps: patch and tethered pumps.
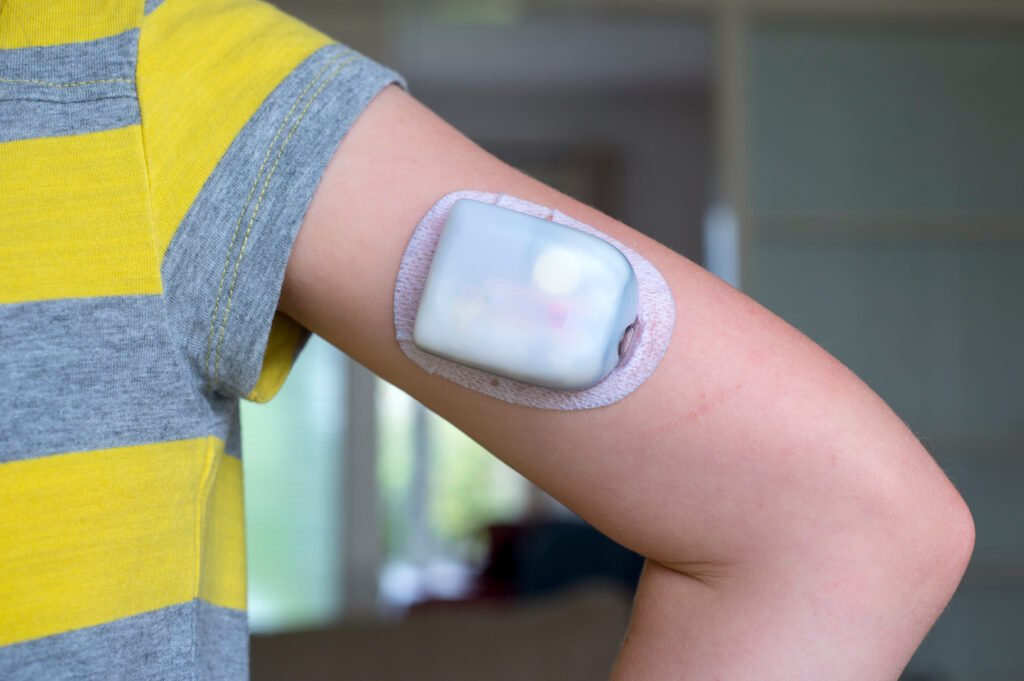
Patch Pumps
Insulin patch pumps are worn directly on the skin. They are similar to traditional insulin pumps but instead of using a tube to connect to an infusion set, insulin patch pumps use a small adhesive patch that is attached to the skin.
These pumps consist of a small device that holds a reservoir of insulin and a small needle or cannula that is inserted into the skin to deliver insulin. The device is attached to the skin using an adhesive patch, and the needle or cannula is inserted into the skin with the push of a button.
They can be worn discreetly under clothing and don’t require any tubing or wires, making them a convenient option for children who are active or who prefer not to have tubing attached to their body.
Tethered Pumps
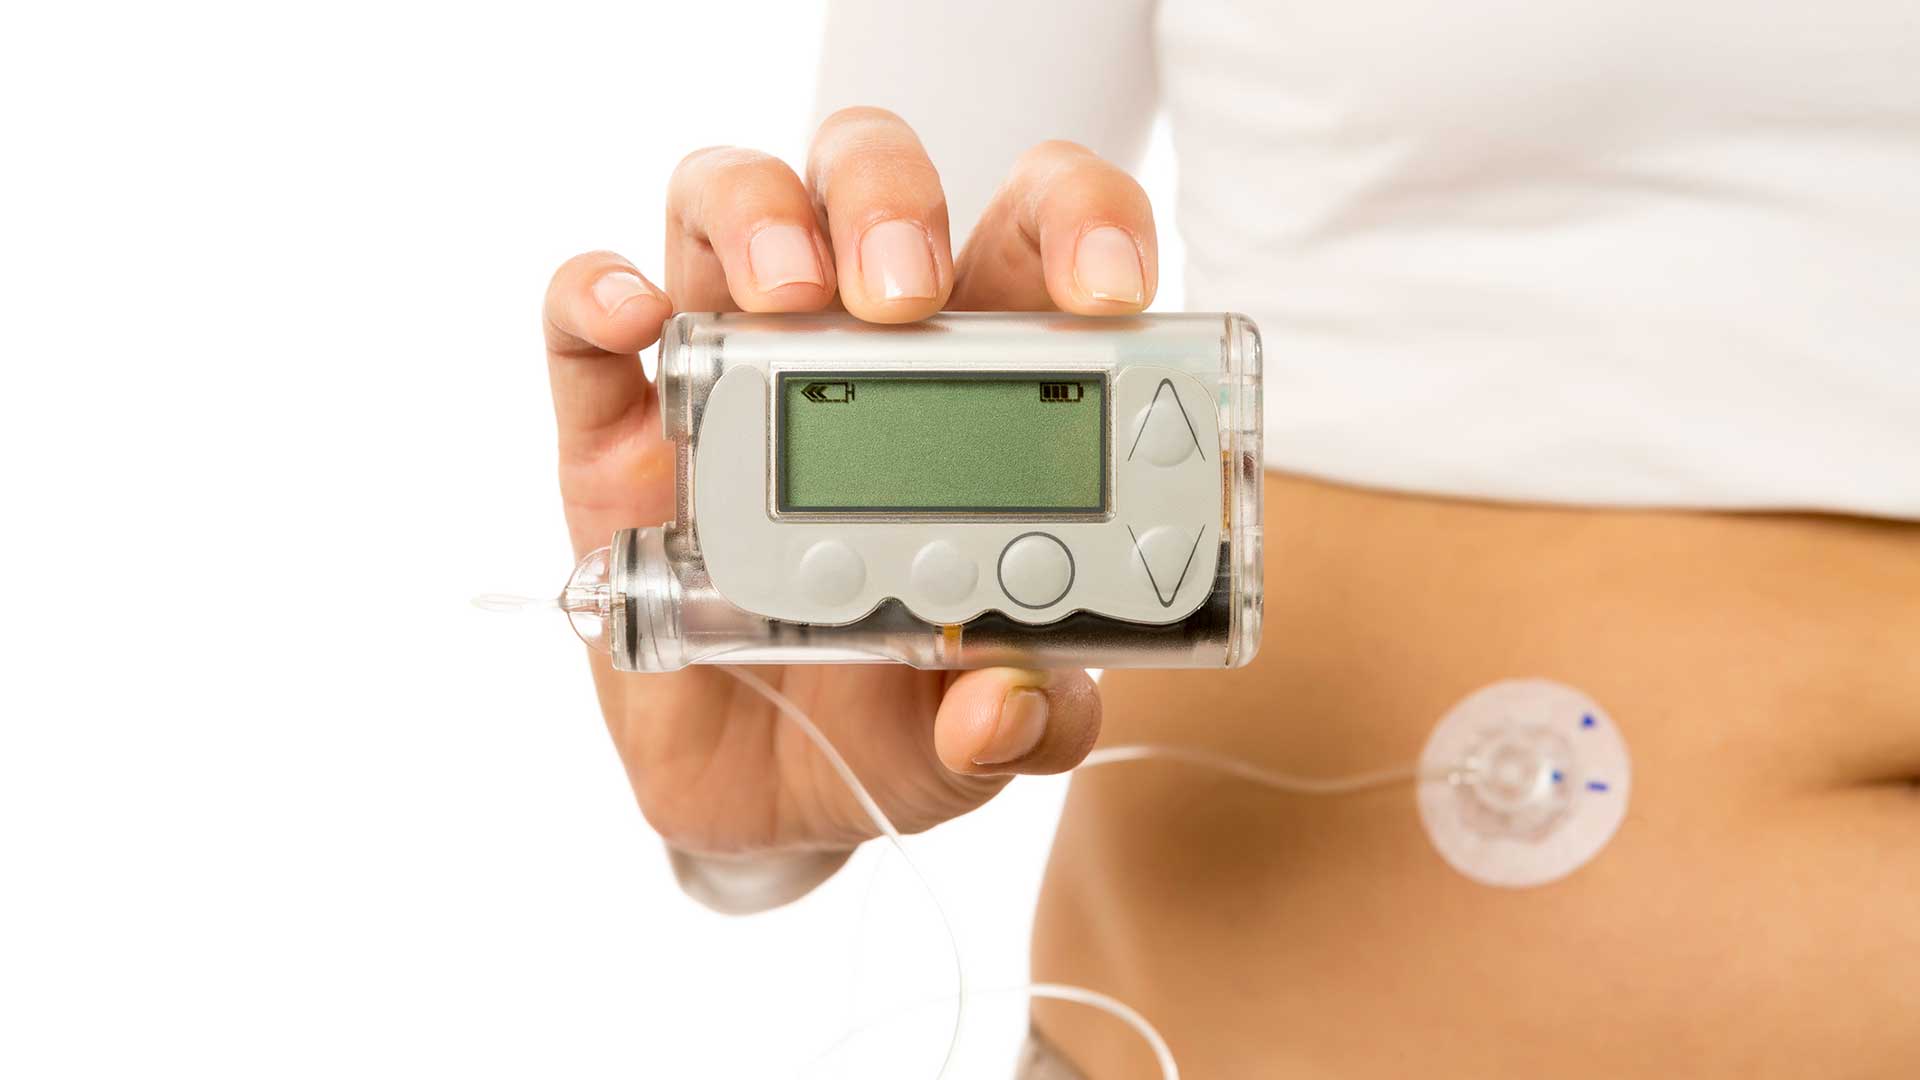
A tethered insulin pump is the more traditional insulin pump. It continuously delivers insulin through a tube and infusion set but isn’t as discreet as the patch pump since the tubing is visible and can get caught on objects or snagged.
Tethered insulin pumps are usually worn on the waistband or in a pocket, and the infusion set is inserted into the skin at a different site on the body. Because of this, they tend to be less convenient, especially for very active children.

How To Use an Insulin Pump?
Using an insulin pump involves several steps, but with some practice, it can become a routine part of your child’s daily diabetes management. Your healthcare provider will usually go over all of this in person with you, so you should listen to their instructions first. That being said, here is a step-by-step guide on how to use an insulin pump:
- Fill the Reservoir: The first step is to fill the pump reservoir with insulin. This can be done using a syringe or a pen device. If you want, you can ask your child’s healthcare provider to show you how to do this.
- Insert the Infusion Set: The next step is to insert the infusion set, which includes a small tube called a cannula, under the skin. Some of the most common insertion sites are the abdomen, thighs, arms or buttocks. Don’t insert the set on the arm if your child is very lean. To insert the infusion set, push the cannula under the skin. Then, use an adhesive patch to hold it in place and ensure it maintains its position.
- Program the Device: Once the infusion set is inserted, the pump can be programmed to deliver insulin at specific times and in specific amounts. The pump should be set up based on your child’s insulin needs, including basal rates, bolus doses, and correction factors.
- Deliver insulin: The pump will automatically deliver insulin based on the programmed settings. Your child may also need additional bolus doses of insulin for meals or to correct high blood sugar levels.
- Change the infusion set: The infusion set should be changed every 2-3 days, or as recommended by the pump manufacturer. This will help avoid infections or skin irritation from the prolonged attachment of the pump on the same site. Changing infusion sites goes beyond changing the point where you attach the cannula to your body. It also involves replacing the worn infusion set with new ones.
Pros & Cons of Using an Insulin Pump
If you’re wondering how insulin pumps compare to insulin pens, here are the pros and cons of using an insulin pump for your child instead of relying solely on insulin pens:
Pros
- Better blood sugar control: Insulin pumps provide a more precise way of delivering insulin compared to injections or pens. This may help improve your child’s blood sugar control. With the use of an insulin pump, your child can adjust their insulin delivery based on their individual needs.
- Fewer injections: Insulin pumps eliminate the need for multiple daily injections, which can be great for children who find injections painful or difficult to manage.
- More flexibility: Insulin pumps provide greater flexibility in your child’s daily diabetes management. Because kids can have a more unpredictable daily life (they can eat meals at varying times and engage in unplanned physical activity, even when it’s short duration), the pump allows them to not have to adjust their insulin doses as frequently.
- Reduced risk of hypoglycemia: Insulin pumps can reduce the risk of hypoglycemia, or low blood sugar. The pump can be programmed to deliver a steady stream of insulin throughout the day, which can help prevent sudden drops in blood sugar levels.
Cons
- Cost: Insulin pumps can be expensive (some cost upwards of $5,000) and may not be fully covered by insurance. In addition to the cost of the pump itself, there are ongoing costs for supplies such as infusion sets and reservoirs.
- Maintenance needs: Insulin pumps require regular maintenance, including changing infusion sets and reservoirs every few days. This can be time-consuming and may require assistance from a healthcare provider.
- Risk of complications: Like with any medical device, there is a risk of complications with insulin pumps. These may include infection, skin irritation, or issues with the infusion site. However, by properly preparing the skin for insertion of the set and changing the site every few days, the risk for complications can be somewhat reduced.
- Technology issues: Insulin pumps are electronic devices and can be prone to malfunctions or errors. This can be particularly concerning if your child is unable to recognize or respond to a problem with the pump. With tethered pumps in particular, there is a possibility of the tubes getting blocked.
- Learning curve: Switching to an insulin pump can be an adjustment and require a learning curve for both you and your child. There may be challenges in learning how to program the pump and properly manage blood sugar levels.


How to Choose the Right Insulin Pump for Your Child?
When selecting an insulin pump for your child, the first thing to do is speak with your child’s doctor or diabetes educator. They will get you into the insulin pump program, where they will decide which pump system is best for your child.
However, there are a few factors to consider when choosing the right insulin pump for your child. These factors are:
- Discretion: Your child may want to ensure the pump is discrete and easily hideable. Patch pumps tend to be a bit more discreet than tethered pumps because they don’t have any tubes and can be hidden under clothes.
- Features: Insulin pumps vary in features, such as the size of the pump, the length of the tubing, and the type of infusion set. Some pumps also have additional features like continuous glucose monitoring (CGM) or automatic insulin delivery (closed-loop systems like the Omnipod 5). Consider which features are important for your child and which pump best fits their needs.
- Ease of Use: Look for a pump that is easy for both you and your child to use. Consider the number of buttons, the size of the screen, and the menu options. Some pumps also have smartphone apps to help manage insulin dosages, which can be helpful for parents.
- Support: You may also want to consider the level of support available from the pump manufacturer. Does the company offer training and support for new users? Are there customer service representatives available to answer questions or troubleshoot issues?
- Cost: If you have insurance, check with your insurance provider to see what costs are covered and if there are any restrictions on which pumps are covered.
Best Insulin Pumps for Children
By now we’ve established that there are different types of insulin pumps available. But which, if any, are best for children?
Let’s briefly discuss three of the best insulin pumps you can get for your child.
Omnipod 5

The Omnipod 5 is one of the best insulin pumps available.
It can integrate with the Dexcom G6 CGM and you can connect both devices to Gluroo, our diabetes management app. This allows you to automate insulin delivery, monitor your child’s blood glucose levels remotely, and much more. We have instructions for how to integrate the OP5 with Gluroo here.
Omnipod 5 also has an excellent waterproof rating.
Omnipod Dash

The Omnipod Dash is another great insulin pump you can consider getting for your child. Its most significant advantage is that it’s suitable for children as young as two years.
It can hold up to 200 units of insulin, which gives your child enough supply to sustain them for at least three days. The pump is also compatible with Gluroo.
Tandem T-Slim x2

As the name suggests, this insulin pump comes in a super slim design, appearing smaller than almost all other pumps.
This ensures more comfort for your child as they wear the device. It can also integrate with CGMs like the Dexcom G6 and supports integration with apps like Gluroo for better diabetes management.
This pump can hold up to 300 units of insulin, which increases the time required to change the infusion site as your child gets a continuous and stable insulin supply.
How Long Does an Insulin Pump Last?
Insulin pumps are fairly durable devices. Regardless of the kind, a typical insulin pump will sustain your child for at least four years, and depending on its usage, it may even extend for up to eight years.
It’s important that the pumps need regular refilling and infusion site changes – often after every two to three days. This helps ensure a consistent insulin supply, allowing the insulin pump to act as the body’s pancreas.
In addition, they need frequent battery recharging for sustenance. Usually, the battery lasts for about 7 to 10 days. However, features like vibration and backlight may cause the battery to drain faster.
So even though the pump itself can last a long time, it still requires some maintenance along the way. You’ll need to regularly change sites and ensure the battery is always charged.
Best Places to Attach an Insulin Pump
When it comes to children, there are some most commonly used attachment sites for insulin pumps. Those usually are:
- Abdomen: This is the most common site for attaching an insulin pump. It’s easy to access and allows for a wide range of motion.
- Thigh: Attaching the pump to the thigh can be convenient, especially for active children who often engage in sports or other physical activities. This site is also easy to access and can be discreetly covered.
- Buttocks: This site is less commonly used than the abdomen or thigh but can be convenient for some children.
- Upper arm: The upper arm can be a good site for older children or those with more subcutaneous fat in the area. Again, this site is less commonly used than the abdomen, thigh, or buttocks, but can be a good option for some children. Just consider avoiding this site if your child has thinner arms.
It’s important to rotate the insertion site frequently to avoid skin irritation so it’s likely you’ll end up going through all of the above-mentioned sites at different times.
How Can You Get an Insulin Pump for Your Child?
If you intend to get an insulin pump for your child, you need to work hand in hand with your child’s doctor.
If the doctor gives you the go-ahead to switch your child’s insulin delivery method to the pump, you can consider following the steps below to get an insulin pump for your child:
- Check insurance coverage: Check with your insurance provider to see if an insulin pump is covered and what the process is for obtaining one. Some insurance providers may require pre-authorization, and others may have specific requirements for which insulin pump is covered.
- Choose an insulin pump: Once insurance coverage is confirmed, work with the healthcare provider to choose an insulin pump that best meets the child’s needs. Consider factors such as your child’s lifestyle, insulin requirements, and personal preferences.
- Learn how to use it: After choosing an insulin pump, you and your child will need to complete training on how to use it. This typically includes learning how to insert the pump infusion set, program insulin dosages, and troubleshoot any issues. Your doctor can direct you to a hospital program that will teach you how to safely use an insulin pump.
Insulin Pump FAQS: All You’ll Need to Know
How Do I Prevent an Infection When Using an Insulin Pump?
Remember that, like insulin pens, the pump also contains a needle that injects insulin under the skin. Therefore, if care and proper hygiene are not maintained, it may result in an infection. The following are crucial for preventing infection when using an insulin pump.
- Ensure that the pump site is clean at all times.
- Closely inspect the infusion site at least once daily, checking for any signs of infections.
- When changing the infusion site, clean the area of the skin with alcohol or IV prep wipes to sterilize the area, reducing the chances of infection. Avoid using soap, as the residue may weaken the strength of the adhesives.
- Check blood sugar levels up to four or five times daily.
- Protect the pump site using a bacteria barrier like Tegadem dressing.
- Ensure regular changing of the infusion site – often, two to three days is advised.
Can I Swim or Shower with an Insulin Pump?
Yes, depending on the type of insulin pump your child has, it can be possible to shower and swim with an insulin pump. Many of the latest insulin pumps have good waterproof ratings that allow your kid to swim without detaching the pump.
Some more popular waterproof insulin pumps include Omnipod DASH and Tandem T-Slim X2. However, you need to ensure the pump is waterproof before taking a quick shower or swimming, lest you damage the device.
Another option for non-waterproof insulin pumps is getting a waterproof pump case that you can simply place over the pump to protect it.
Can My Child Travel with an Insulin Pump?
Yes, children with insulin pumps can definitely travel with them. Traveling with an insulin pump requires a little extra planning, but it can be done safely and easily with the right preparation.
Here are some tips for traveling with an insulin pump:
- Plan ahead: Make sure you bring enough supplies for the entire trip, including extra insulin pump cartridges, infusion sets, and batteries. Consider bringing a backup insulin injection kit as well, in case the pump malfunctions or is lost or stolen. Feel free to check out our diabetes travel checklist for all the needed supplies.
- Carry a doctor’s note: It’s a good idea to carry a letter from your child’s doctor explaining the need for an insulin pump and any related medical supplies. This can help avoid any issues with airport security or customs.
- Prepare for time zone changes: If you’re traveling across time zones, it’s important to adjust insulin doses accordingly to avoid hypoglycemia or hyperglycemia. You can talk to your child’s healthcare provider about how to adjust insulin doses when traveling.
- Check airline policies: Some airlines have specific policies for traveling with medical devices, including insulin pumps. Check with the airline in advance to ensure that you are complying with any policies or procedures.
- Keep supplies accessible: Keep insulin pump supplies and medications in a carry-on bag and easily accessible during the flight.
Can I Use an Insulin Pump with a CGM (Continuous Glucose Monitor)?
Yes, several insulin pumps are compatible with CGMs. In fact, it’s advised that you incorporate the pump with the CGM, as this helps improve the monitoring of your child’s blood sugar levels.
Also, some pumps can communicate with these monitors, allowing easier blood sugar regulation by delivering the right amount of insulin required to drop glucose levels in the case of hyperglycemia.
What Should I Do If My Child Accidentally Disconnects Their Insulin Pump?
If your child disconnects their insulin pump for whatever reason, you should follow the steps below:
- Assess the situation: Check the pump to see how long it’s been disconnected and whether any insulin has leaked out. If the pump has been disconnected for a long time, blood glucose levels may have already started to rise.
- Reconnect the pump: If possible, reconnect the pump and resume insulin delivery. Make sure the pump is securely attached and functioning properly.
- Check blood glucose levels: Monitor your child’s blood glucose levels frequently for the next few hours to ensure they stay within a safe range. Adjust insulin doses as needed to keep blood sugar levels under control.
- Consult with a healthcare provider: If needed, contact your child’s healthcare provider for further guidance on how to manage the situation. They may recommend additional blood glucose monitoring or adjustments to your child’s insulin regimen.
Most of all, don’t panic if this happens. Just make sure you follow the steps above and remember that if the pump hasn’t been disconnected for long, it’s no cause for worry.
What is the Monthly Cost of an Insulin Pump?
There is no definite monthly cost for insulin, as it depends on your insurance coverage. However, a suitable plan may put the pump at about $50 per month. Without insurance, the overall cost of getting an insulin pump is around $4,500 to $6,000, and you may still need to spend up to $1,500 on insulin supplies yearly.
How Do I Dispose of an Old or Expired Insulin Pump?
You should dispose of insulin pumps in an electronic waste bin at an e-waste center.
The fastest way to find the nearest e-waste centers around you is to Google “e-waste center near me.” However, as it may vary, you might want to check through the e-waste laws governing your states. Regardless, many electronic stores tend to run an e-waste disposal system, so you may want to consider visiting one to make more inquiries.
Can My Child Still Live an Active Lifestyle While Using an Insulin Pump?
Yes, your child can definitely live an active lifestyle while using an insulin pump. In fact, an insulin pump can be a great option for active children because it allows for more flexibility in managing insulin doses during physical activity.
Insulin pumps can be easily detached and reattached, making them convenient for activities such as sports, swimming, and other physical activities. Also, some insulin pumps have features like exercise modes, which adjust insulin dosing during physical activity to prevent hypoglycemia.
Children with type 1 diabetes need to be physically active for their overall health and well-being. With proper management and support from healthcare providers, children can participate in a wide range of activities while using an insulin pump.
Overall, Insulin Pumps Are a Great Option For Children with T1D
Insulin pumps are a great option for children with type 1 diabetes as they provide more flexibility and precision in insulin delivery than traditional insulin injections.
Just make sure you always include your child’s doctor in any decisions you make regarding their diabetes management, including the decision to switch your child over to an insulin pump, if you so desire.
And know that with the proper support and management, children can successfully use an insulin pump to manage their diabetes and lead healthy, active lives.